Chat with robot using phone and PC
In this lecture, you can read a guide that will demonstrate you how you can chat with your robot on PC, using your mobile device as a Bluetooth connection gateway.

Figure 1 - Connections demonstrated
Requirements
- Internet connection
- An Android phone with version 5.0 (Lollipop) or above
- Integrated Bluetooth chip in your phone
- Lego Sniffer with Touch sensor: Lego Sniffer robot build instructions
- Ozeki 10 installed on your phone: Installing Ozeki 10 on your Android device
- EV3 Brick paired with your phone using Bluetooth: Bluetooth pairing on Android phones
- EV3 Brick connected to your phone: Connect the Lego robot to phone
Sign in with the provided login informations
After you have started the phone application, and clicked on the 'Start service' icon, you need to wait a couple of seconds until it starts the service. It will provide you a link and user login informations: 'Default user' and 'Password'. On your PC, in your web browser bar you need to enter the given link. Then type in the 'Default user' name on the top box, and the 'Password' to the bottom one, then click 'OK'. You can see the process of this task on Figure 1, marked with red arrows.
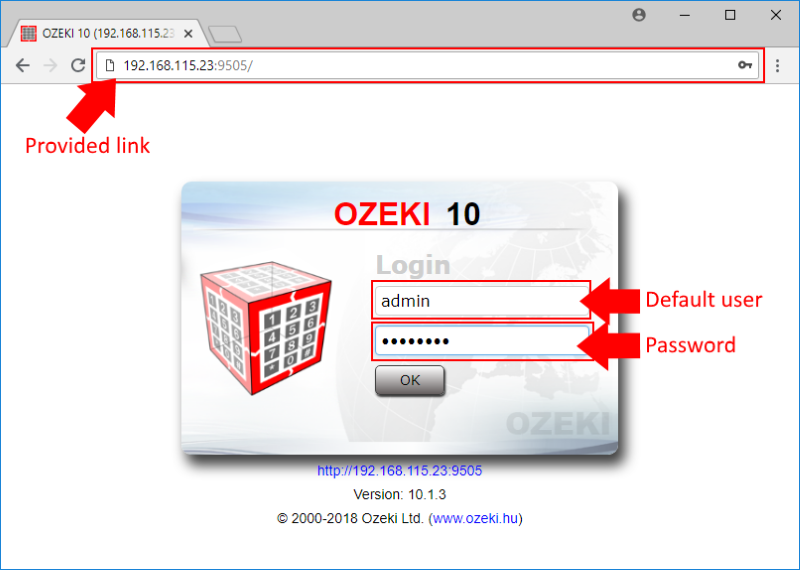
Figure 2 - Signing in on PC
Choose LED Lego connection
After you logged in, navigate to the 'Control Panel' which can be reached from the 'Start' menu. There you need to find the Lego LED connection, in this example as you can see on Figure 2, this connection is named 'LED_1@localshost, this name can be other on your PC. You will also find a couple of other connections, including other Lego robot connections, phone connections also. After you have found it, click on it, there you will be able to chat with it, change its settings and so on.
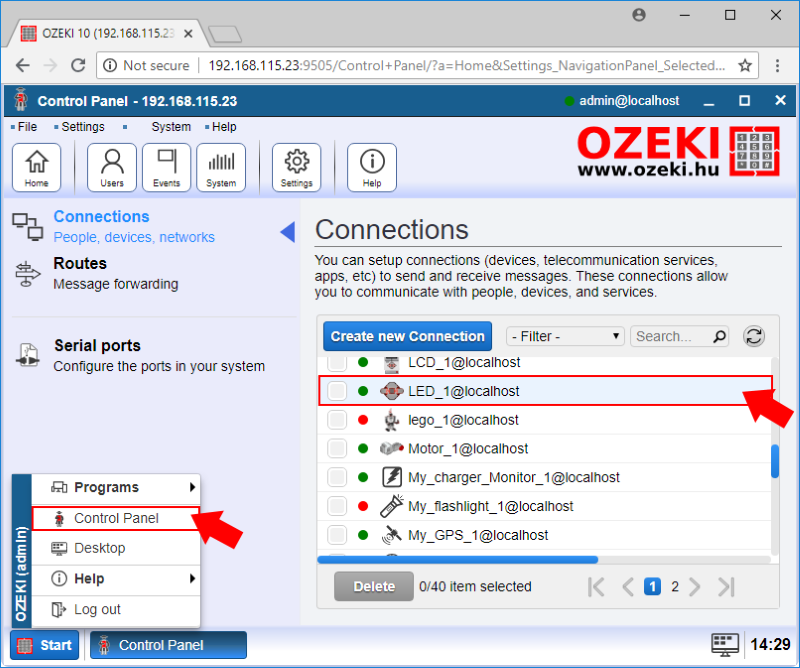
Figure 3 - Choosing LED
Send commands through Ozeki chat function
In the LED connection details page, you can find a tab called 'Chat', there you can send commands, messages to your robot LED connection, sensor. You can query all the commands with a 'help', then for example if you want to change the LED color to orange, you can type 'orange' and click 'Send'. You can choose from many commands, the full command set can be seen at 'The Brick Status Light' section on this page at the bottom, where you can also find basic commands.
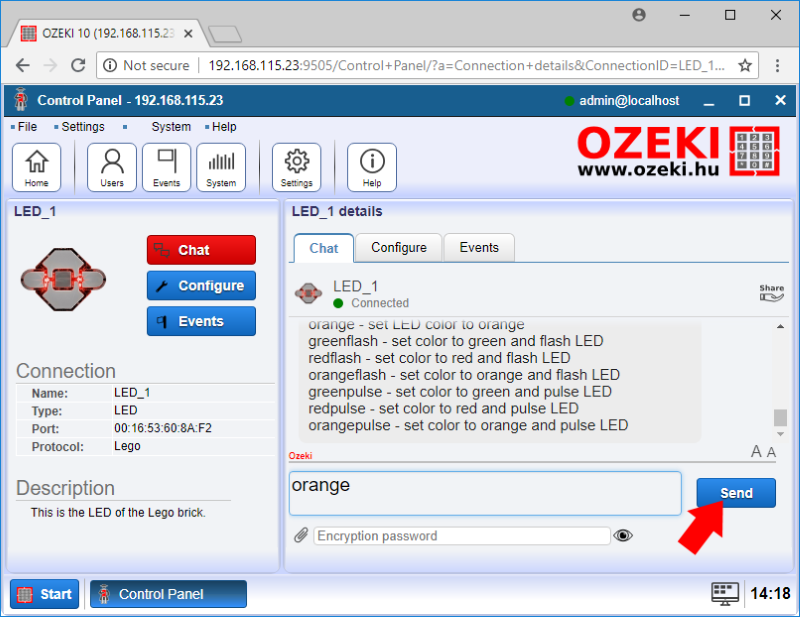
Figure 4 - Choosing LED
Choose Snap to build your own program
You can control the robot, and its components, sensors, using simple commands utilizing Ozeki chat, but you can also manage it with programing. That's what Snap is used for, you can create complex programs, using blocks, where you have more room to create something complicated you would like to do with your robot using some programing skill. From the Ozeki Desktop you need to select 'Snap', if you want to write programs with a large set on programing blocks.
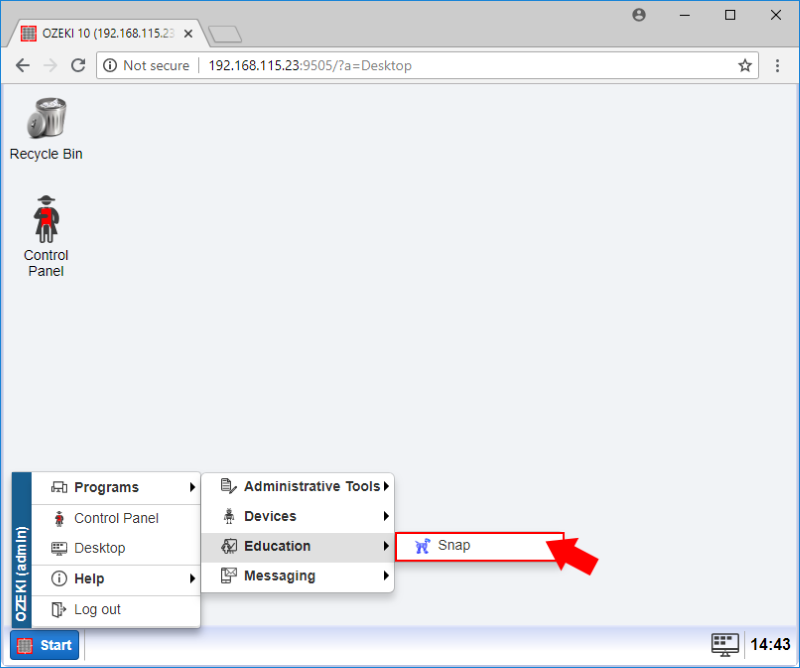
Figure 5 - Choosing Snap
Example program
In this task we are going to make a program, first of all you need to connect a Touch tensor to your robot. In this program, when you press the Touch sensor button, the led will start flashing in orange color. You can do this simple task with a program, shown at Figure 5. Select a 'when [condition]' block from 'Control' category, attach a 'Button on [sensor_type]?' block into 'condition' field, where from the 'sensor_type' menu you can choose 'Touch_Sensor_1'. After that you just need to add 1 block, from the 'Lego' category, search for 'Set LED [mode]', where 'mode' will be 'orange_flashing' from the drop down menu, if you want to flash the robot's led in orange color.
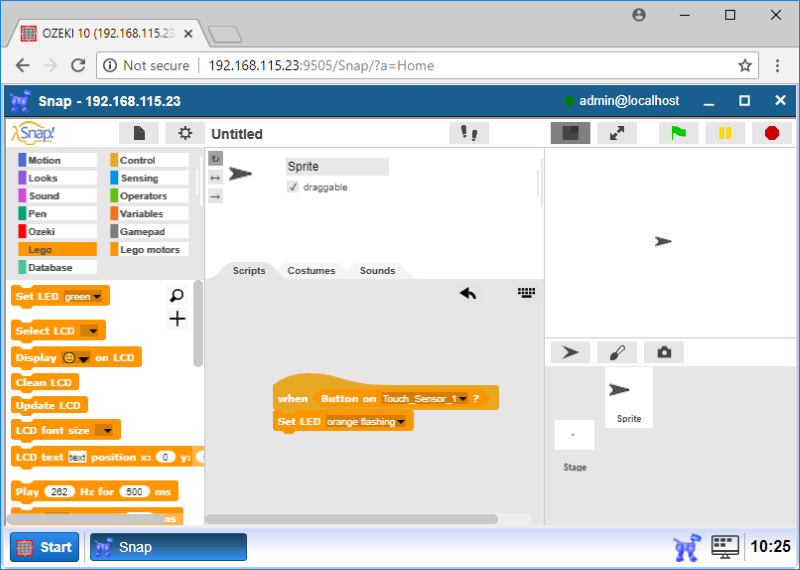
Figure 6 - Bulding a program
The Brick Status Light command set
With the listed text commands you can control the LEGO LED effectively from Ozeki 10. The first 'Description' table contain all the commands to control the LED, the 'Command table' control all the basic commands that is gonna help you using this chat funcionality. These messages can be sent from e-mail, SMS or Snap codes, so you can choose from different options.
| Command examples | Description |
|---|---|
| off | turn off the LED |
| green | set LED color to green |
| red | set LED color to red |
| orange | set LED color to orange |
| greenflash | set color to green and flash LED |
| redflash | set color to red and flash LED |
| orangeflash | set color to orange and flash LED |
| greenpulse | set color to green and pulse LED |
| redpulse | set color to red and pulse LED |
| orangepulse | set color to orange and pulse LED |
Commands Table - These commands can controll the LED
| Basic commands | Description |
|---|---|
| help | request the command set |
| subscribe | subscribe to device messages |
| unsubscribe | unsubscribe from device messages |
| subscribers | shows the list of subscribers |
Basic commands Table - General commands for all devices